
How to make a contour spot color in Adobe Illustrator
Would you like to have a sticker, card, or sign cut into a specific shape? You can! Select "Contour cut" in the order form under "Finishing".
You will need to add a contour line to your design for this. This serves as the cutting line. You can do this quite easily by creating a closed-line shape with a spot color on a separate layer. Below, you'll find exactly how to do it.
Instructions for adding a contour line using Adobe Illustrator:
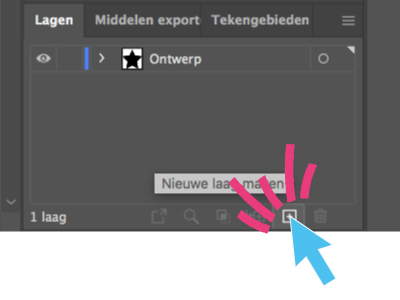
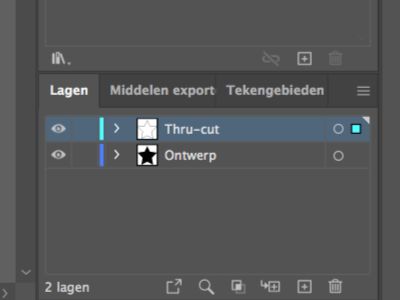
Create a new top layer (= foreground) in your document and name it: "Thru-cut".
Tip: Maintain organization in your file by naming the other layer "Design".
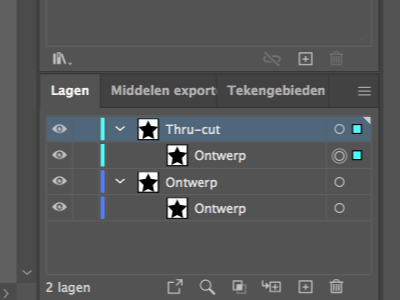
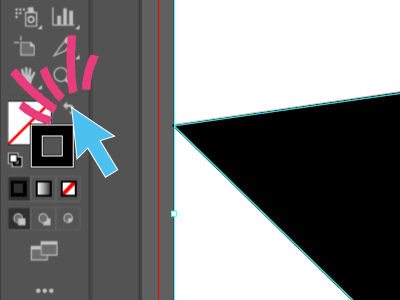
2. Copy the shape from your design to the top layer (Thru-cut).
Ensure that this shape has no fill, only a stroke. You can quickly achieve this by swapping the fill and stroke.
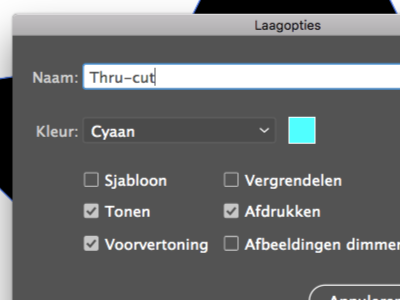
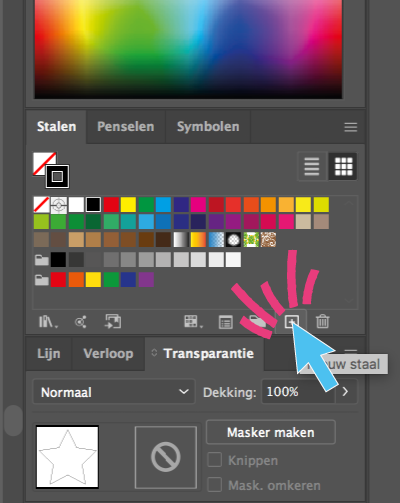
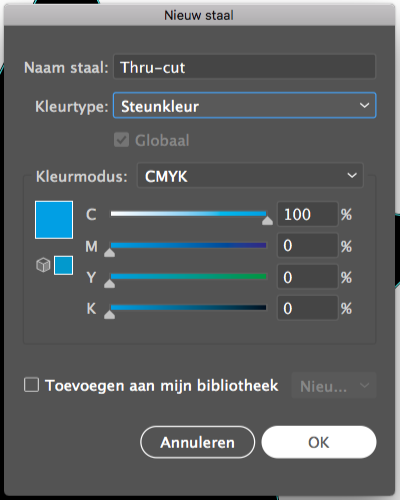
4. Create a new swatch and name it "Thru-cut" as well. Choose the color type "Spot Color".
Select the color mode "CMYK" and set the color C (Cyan) to 100%. Set the remaining colors M, Y, and K to 0%. Apply this color to the stroke.
Done! Your file now has a contour line. No worries: that Cyan-colored line is a spot color and will not be printed.
To print your design edge-to-edge, you'll need to add bleed. Printing edge-to-edge means you won't see any white edges after cutting or, in this case, after contour cutting.
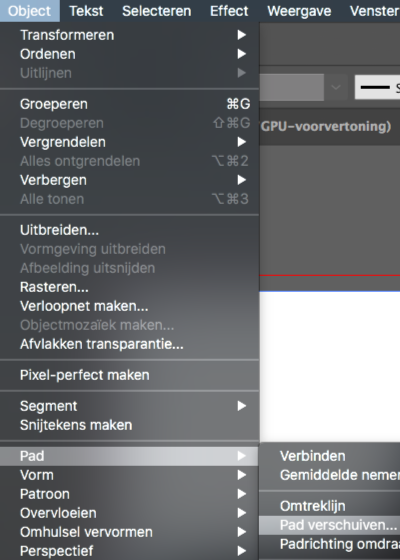
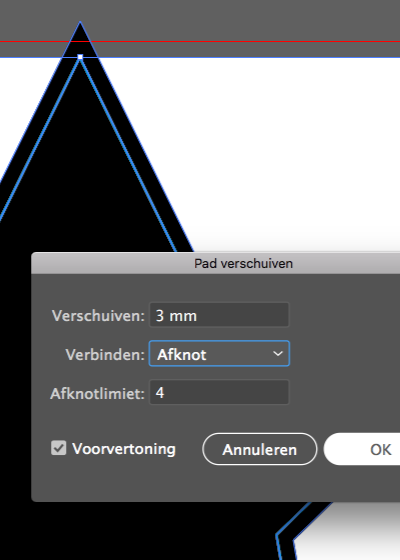
5. Select your object (the shape) and go to Object > Path from the main menu and click on "Offset Path". Set it to 3 mm.
Now your object has bleed added and can be printed edge-to-edge.
6. Save your file as a PDF to upload it in the order form.